


Introduction
Injecting more brand personality into our mobile app is something mobile developers come across more often as a project might require you to build their app using a particular font. Also, if you are looking to create a consistent experience for your users, then you will want to use your own hand picked font. In this article, we will be learning how to inject custom fonts in our react-native expo project and refactoring the font implementation to apply for the whole project . For using custom font in react-native cli, you can check this Link to my article where I explained it as well.
1. Setting up the Project
We start off by creating a react-native project in expo using this command:
expo init expo-custom-fonts
Then we can choose the template we want to use which is the first one and wait for the process to complete.
Now that the process is complete we can run our project using
expo start
This will start up a development server for us where we can run our project on ios and android by pressing 'i' or 'a' respectively in the Metro development server.


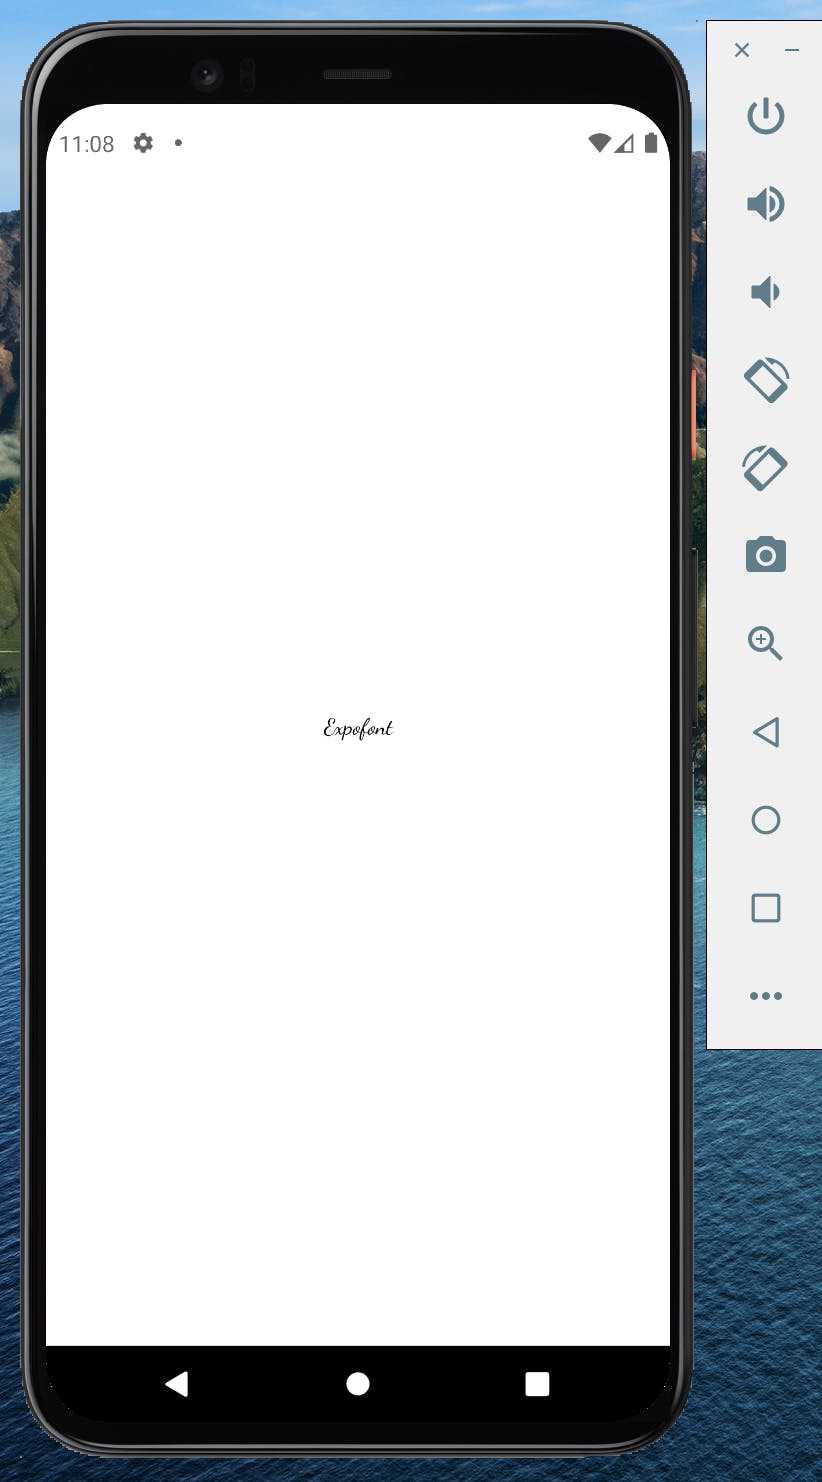
Now this is how our screen looks like displaying the 'ExpoFont' text in our App.js file.
2. Using the Custom Fonts
We will be using Google Fonts as expo has a first-class support for all fonts that are listed on Google Fonts. We will be using the font called Dancing Script in this project.
To use the Dancing Script Fonts, we will install the font-npm-package package using the command below:
expo install @expo-google-fonts/dancing-script
3. AppLoading Components
After installation, then we can integrate this font in our app. But before that, we will be introducing a component called into our project as well. This is useful because, the fonts are not going to be ready right away when the app starts loading, so it is recommended to not render anything on the UI until the font is loaded and ready to be displayed.
To use this component we will need to install the expo-app-loading package using this command:
expo install expo-app-loading
Once this is installed we can then make use of it in our ExpoFont component like this:
import AppLoading from "expo-app-loading";

if (!fontsLoaded) {
    return <AppLoading />;
  }
What this does is, it tell the application that if our custom font (Dancing Script) has not loaded yet, return AppLoading and do not display anything on the UI screen until the font is loaded.
4. useFont Hook
Now we are ready to integrate our DancingScript font to our app. We will using the useFont hook.
import {
  useFonts,
  DancingScript_400Regular,
  DancingScript_500Medium,
  DancingScript_600SemiBold,
  DancingScript_700Bold,
} from "@expo-google-fonts/dancing-script";

 let [fontsLoaded] = useFonts({
    DancingScript_400Regular,
    DancingScript_500Medium,
    DancingScript_600SemiBold,
    DancingScript_700Bold,
  });
Then we can Add the Font Family name to the text element inside the ExpoFont Component. The overall code will look like:
import React from "react";
import { View, Text, StyleSheet } from "react-native";
import AppLoading from "expo-app-loading";
import {
  useFonts,
  DancingScript_400Regular,
  DancingScript_500Medium,
  DancingScript_600SemiBold,
  DancingScript_700Bold,
} from "@expo-google-fonts/dancing-script";

const Expofont = () => {
  let [fontsLoaded] = useFonts({
    DancingScript_400Regular,
    DancingScript_500Medium,
    DancingScript_600SemiBold,
    DancingScript_700Bold,
  });

  if (!fontsLoaded) {
    return <AppLoading />;
  }
  return (
    <View>
      <Text style={styles.text}>Expofont</Text>
    </View>
  );
};

const styles = StyleSheet.create({
  text: {
    fontFamily: "DancingScript_500Medium",
  },
});
export default Expofont;
And we have an output of:

But you'll agree with me that this method is not an efficient way of working on a large expo project. Say you have to use three different fonts, the App.js becomes messed up trying to import all fonts in there to use. Additionally, there are cases where the styles does not apply to all the components of your project, i.e the font only works on App.js file.
5. Refactoring
We'll create a folder called hooks and inside this folder, we will have a file named useFont.js which will hold all the custom fonts we will be using throughout our project.
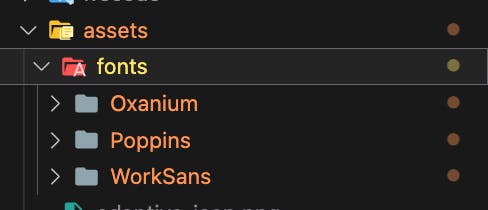
We will be testing with three different fonts: Oxanium, Poppins, WorkSans. Go to Google Fonts Website, search for these fonts and click on download family to download them. After you finish downloading you can then extract the fonts file (.tff) from the zip file and move it to the asset/fonts directory as shown below:
Now we will create a component folder and have three components: Oxanium.js, Poppins.js, WorkSans.js
Inside the useFont.js we will write
import * as Font from "expo-font";

export const useFonts = async () => {
  await Font.loadAsync({
    OxaniumBold: require("../assets/fonts/Oxanium/Oxanium-Bold.ttf"),
    PoppinsRegular: require("../assets/fonts/Poppins/Poppins-Regular.ttf"),
    WorkSansRegular: require("../assets/fonts/WorkSans/WorkSans-Regular.ttf"),
  });
};
The expo-font-package provides us with the loadAsync method which will help us add the fonts.
The App Loading components keeps the application loading open until the fonts gets loaded to be displayed.
Then we will load our components in the App.js file by importing the useFont hook:
import { StyleSheet, Text, View } from "react-native";
import React, { useState } from "react";
import Oxanium from "./components/Oxanium";
import AppLoading from "expo-app-loading";
import { useFonts } from "./hooks/useFonts";
import Poppins from "./components/Poppins";
import WorkSans from "./components/WorkSans";

const App = () => {
  //setting the initial loading to false
  const [isLoading, setIsLoading] = useState(false);

  // loading the fonts
  const LoadFonts = async () => {
    await useFonts();
  };

  if (!isLoading) {
    return (
      // if the font is not loaded return AppLoading
      <AppLoading
        startAsync={LoadFonts}
        onFinish={() => setIsLoading(true)}
        onError={() => {}}
      />
    );
  }
  return (
    <View style={styles.container}>
      <Oxanium />
      <Poppins />
      <WorkSans />
    </View>
  );
};

export default App;

const styles = StyleSheet.create({
  container: {
    flex: 1,
    backgroundColor: "#fff",
    alignItems: "center",
    justifyContent: "center",
  },
});
We set a state to check and update our loaded fonts coming from the useFont hook.
The LoadFonts function is aynchronous, meaning it takes time to be completed(to load our fonts).
Then we do a conditional check, if the isLoading is false and has not load, then we are returning an AppLoading component that will start the LoadFonts helper function asynchronously using (startAsync={LoadFonts}). Once the fonts get loaded onFinish={() => setIsLoading(true)} sets the state to true which will then render the component.
Sample of one of the component file: Oxanium.js (the other 2 components have the same structure as well)
import { StyleSheet, Text, View } from "react-native";
import React from "react";

const Oxanium = () => {
  return (
    <View>
      <Text style={styles.text}>Oxanium</Text>
    </View>
  );
};

export default Oxanium;

const styles = StyleSheet.create({
  text: {
    fontFamily: "OxaniumBold",
    fontSize: 40,
  },
});
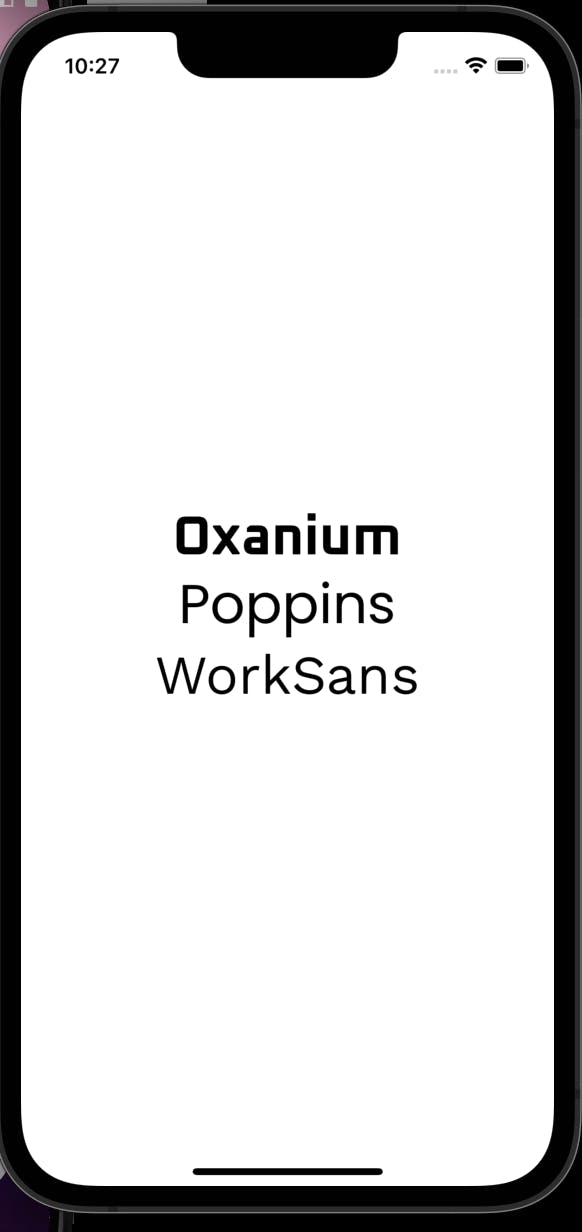
Now we can see our output and how we can use these fonts throughout our project.
Conclusion
Thank you for reading and hope you have learnt a new stuff in the usage of custom fonts in an expo app. You can check out the final code in my github repo here.